.
|
WA8LMF Home Page | Useful Links | Updated 5 May 2014 |
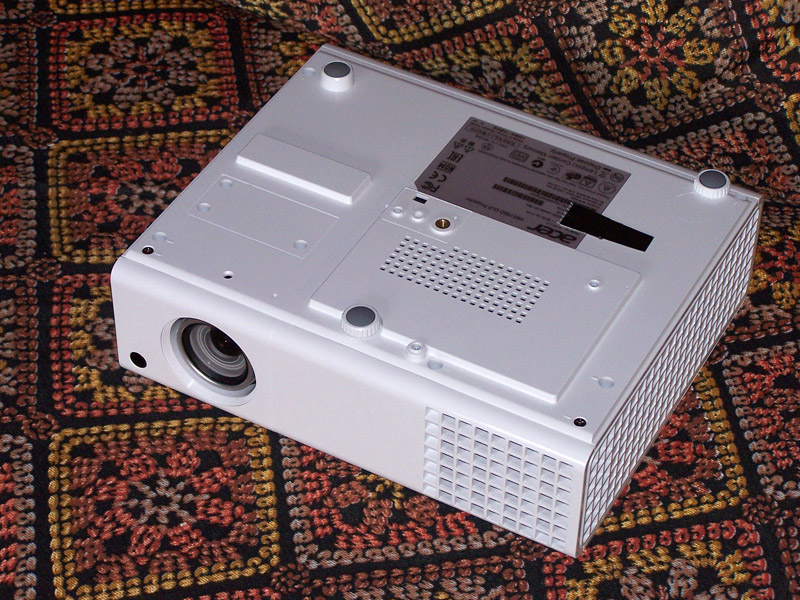
I recently acquired an Acer H6510BD video projector. This full 1080-HD 3D-capable DLP projector with HDMI, analog VGA, component and composite inputs is an amazing value, periodically offered for under USD $600 at New Egg and other online outlets. A month-long project to convert my basement room/ham shack into a home theater setup followed.
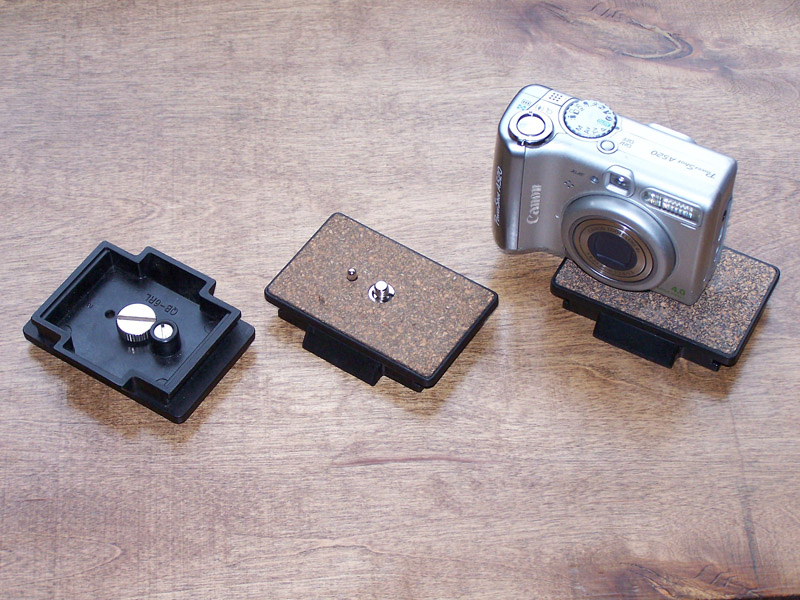
I have a 20-year old Velbon 608 "VideoMate" tripod intended to support fairly heavy video camcorders. It uses a quick-release plate system to mount cameras.
It uses these plates mounted to the bottom of cameras ..
.
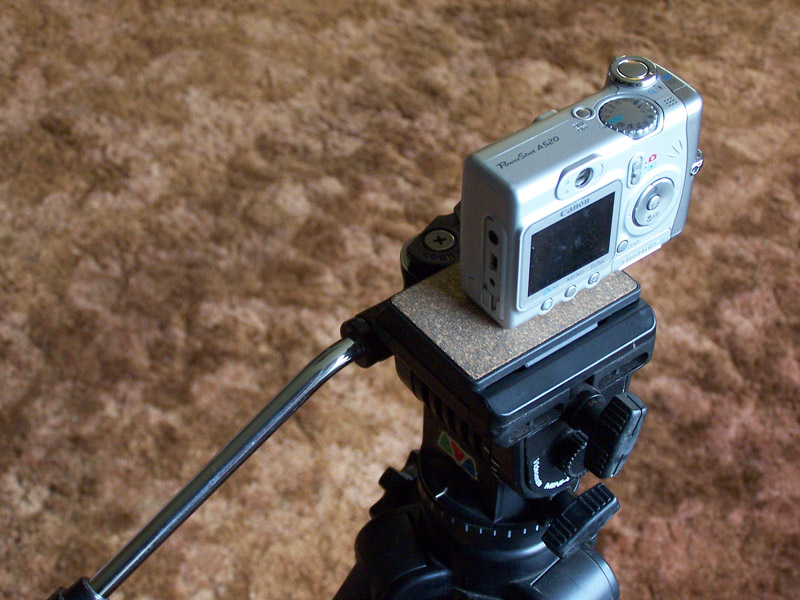
to snap onto the top of the tripod...
![]()
like this:
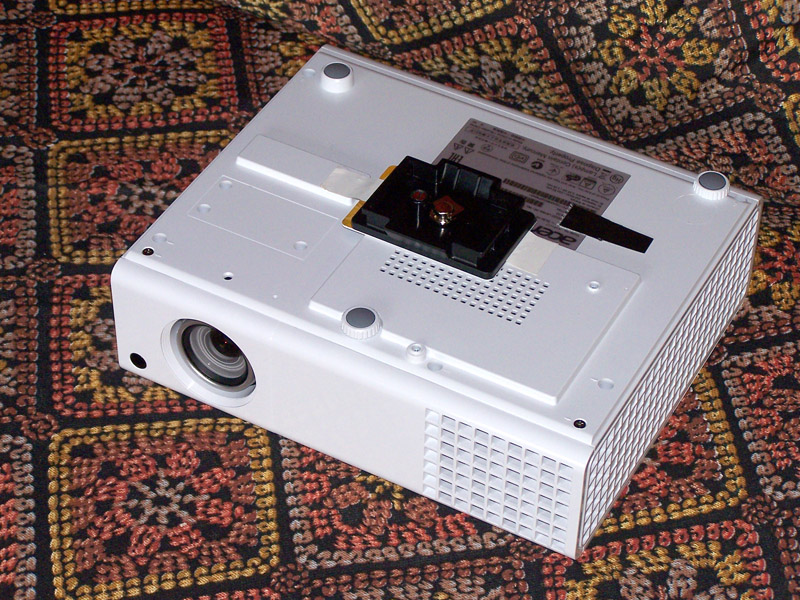
I discovered that the new projector has a 1/4"-20 screw hole at the center of
the case for a standard camera tripod mounting bolt, instead of the usual screw
holes for a 3-point ceiling mount from a hanging mast.
It too can accept the tripod mound plates. It even had the matching side hole
for the anti-rotation pin on the mount plates.
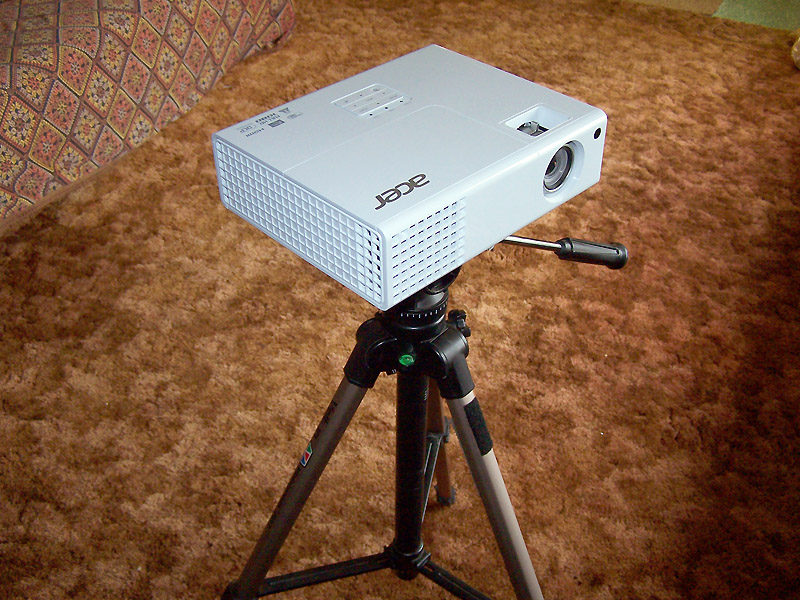
The projector weighs less than 5 pounds (2.2 Kg) and is easily supported by
the tripod. This makes for a very quick and easy setup for presentations and
impromtu slide shows. No table or AV cart required!
A nice feature of this projector that the center axis of the lens is NOT aligned with the center of the projected picture like most projectors. Rather the optical path is bent in such a way that projector center line needs to be located slightly below the bottom of the picture (or above it if the device is hanging upside-down from the ceiling).
This is a huge advantage in presentations. The projector doesn't have to be high enough to block the view of audience members seated directly behind it. In my home setup, it meant the projector could be mounted almost flush against my rather low-hanging suspended ceiling, rather than dropped down a foot or two on a mast.
I also discovered that the fluid pan-head assembly from my old tripod is
available by itself, without the legs, as a Velbon PH-368, and is still
available today. It has the identical quick-release mounting plate setup
as the one on the complete tripod. The bottom of the pan head accepts a 3/8'-16
bolt for mounting. I mounted the head with such a bolt passed though an
acoustic ceiling tile. The weight is spread out on top of the soft tile by
a 1-foot (30 cm) diameter aluminum disk (actually a lid for a cooking pot) with
a hole drilled in it's center. By using the same pan head assembly as
the tripod, the projector can instantly be removed from the ceiling and used
with the tripod instead for outside presentations. Click the picture for an animated GIF
image of the assembly.

On the other side of the room, I build a custom screen to fit into this picture window. I cut a piece of 1/2" styrofoam building insulation to the exact dimensions of the window opening. One side of the foam had a shiny silver Mylar vapor barrier bonded to it. I put two coats of matte-black paint on the other side to totally block light transmission (the aluminized Mylar film was NOT totally opaque), followed by two coats of matte white. The total weight of this home-brew screen is about two pounds (1 KG) and sticks to the window frame with Velcro. The dimensions of the screen are about 80" (2m) wide by 48" (1.2m) tall. This is the equivalent of about a "92 inch" diagonal HDTV.
Click the picture below to see an animated sequence of the
transformation of the south-facing picture window at mid-day into a completely
dark movie theater. The speakers are the left front, right-front and
center-dialog channels of a Dolby 5.1 surround sound system. Two "Smaller Advent"
speakers are the rear surround channels, while two more Smaller Advents in parallel form
the subwoofer LFE channel. Note the projector hanging from the ceiling.